Building and plumbing a house can take a lot of precision, skill, and perseverance. In any case, plumbing systems typically go into a home before the concrete slab is poured. This is because they are typically installed beneath the slab. Even before you pour the slab, the building inspector usually needs to approve and sign off on the drain-waste-vent.

But what happens when you already have a concrete slab present and you want to plumb a toilet? In this case, you would typically need to hire a contractor to cap the old drain, cut the slab, install a drainpipe stub-up, and a shutoff valve in the new concrete slab.

Alternatively, you can install a new toilet in a concrete slab by installing the new toilet flange at the stub-up, and setting the toilet yourself. If You Have a Plumbing Line Already Present

Supplies You Will Need

  • Closet flange
  • Rotary hammer
  • ½-inch drill bit
  • Safety glasses
  • Shop vacuum
  • Concrete anchor bolts (½-inch-by-1½-inch)
  • Hammer
  • Spray lubricant
  • Wooden block
  • Socket and ratchet
  • Closet bolt kit
  • Wax ring
  • Open-end wrench
  • Pliers
  • Flexible supply line (16-inch)
  • Adjustable pliers

Installing a Closet Flange

If you have a plumbing line present, then you can begin by installing a closet flange, also known as a toilet flange. This mounts a toilet to the floor and will connect the toilet drain to a drain pipe.

Step 1

  • Start by placing the closet flange face down on the slab. You should have the hub with a rubber sleeve facing up.
  • Center the flange over the stub-up in the slab. You should rotate the flange so the slots secure the base of the toilet bowl.
  • Mark the slab at the location of four machined holes on the flange.
  • Place this aside.

Step 2

  • Take your rotary hammer and place on it your ½-inch concrete bit.
  • Make a reference mark 1½-inch from the end.
  • Make sure you are wearing your safety glasses and drill 1½-inch holes at each mark on the slab. These will be your concrete anchors.
  • Remove any extra concrete debris from each hole.

Step 3

  • Unscrew the bolts.
  • Insert an anchor into each hole.
  • Tap the anchors into place with your hammer.

Step 4

  • Take your spray lubricant and coat the rubber sleeve on the flange hub.
  • Make sure the flange is face up.
  • Align the hub at the stub-up in the slab.
  • Now, align the machined holes with the concrete anchors.
  • Push down on the flange and attempt to fit the lower end of the sleeve into the stub-up.

Step 5

  • Now, take your wooden block.
  • Place it across the top of your flange.
  • Hit it with a hammer, and make sure the sleeve fits fully into the stub-up.
  • The underside of the flange should fit flush with the slab.
  • Install the anchor bolts, then tighten with your socket and ratchet.

Installing the Toilet

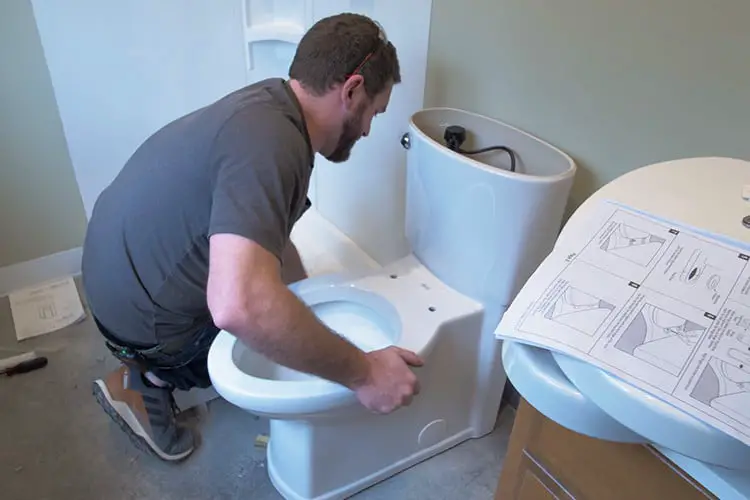
The next portion of this installation involves actually installing the toilet.

Step 1

  • Open the closet bolt kit.
  • Insert the heads of the bolts into each slot of the flange. The stem of the bolt should be a pin-up.
  • You should then place a notched nylon washer onto each stem and make sure it fits flush on the flange.

Step 2

  • Measure straight out from the face of the wall.
  • Both bolts should be the same distance from the wall.
  • Press down to ensure the bolts and vertically secured.

Step 3

  • Place a new wax ring in the center of the flange. The waxed side should be up.
  • Hold this over the hole at the stub-up.
  • If possible, ask for someone to help you by holding the toilet up to align the holes to the base of the bowl.
  • Set the toilet in place on the slab.

Step 4

  • Be sure to measure from the wall to the back of the toilet tank. Adjust the toilet as needed so that the tank aligns with the wall.
  • Take a plastic washer from the kit, and place one on to each bolt.
  • Take a steel washer from the kit and place one on to each bolt.
  • Screw a crown nut and tighten against the steel washers with your open-end wrench.

Step 5

  • Close the lid, and sit on the toilet. Rock your weight from side to side. This is to make sure that the wax ring is secured.
  • Tighten the crown nuts once again.
  • If you can, grip the excess portion of a bolt stem with pliers. Move the stem back and forth, and break off the extra bit.
  • Do this for each bolt.
  • Place a plastic cap over each attachment, then push down to snap them onto the steel washers.

Step 6

  • To finish this job, screw one end of a 16-inch long flexible supply line onto the threaded nozzle.
  • You will find this on the underside of the toilet tank.
  • Now, screw the other ends onto the threaded nozzle. You will find this at the shutoff valve on the wall.
  • Tighten the connections with adjustable pliers, and you’re done!

If You Do Not Have a Plumbing Line Present

If you are in a situation where you will need to physically plumb a line into the room where you plan to place the toilet, then you have a lot more work ahead of you. Before installing the toilet on your concrete slab, you will need to dig trenches and plumb a line.

Step 1: Plumbing Trenches

The first step is to dig the actual trenches for your drain-waste-vent system. Water supply lines can be installed into the actual walls, but you still must dig trenches that sit beneath the slab. This is required to install your drain-waste-vent system that drains toward the sewer connection.

When digging each trench, be aware that it must have a slope identical to your local building code requirements. Typically this is a 1/4-inch drop per foot, but check to be sure.

Steep 2: Stand Pipes

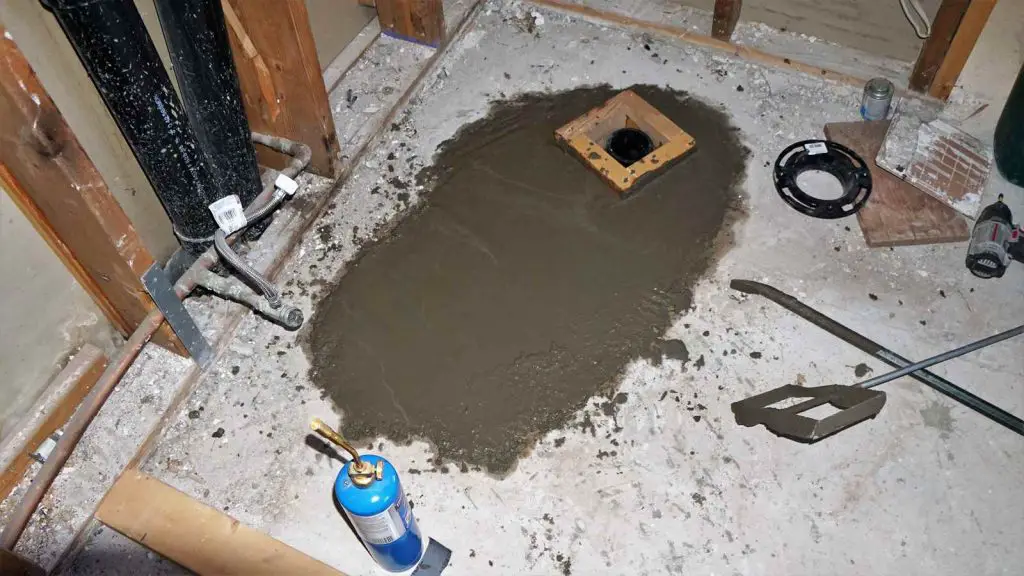
Plumbing trenches are normally dug at the same time as the slab footings. After digging the trenches, you can add both sewer pipes and stub-outs. These are pipes that sit above the slab floor. These will eventually connect to your toilet or any other drains.

You need stub-outs in order to have vent stacks. These stacks will go all the way through the roof. You once again need to be aware of your local plumbing code, as it will dictate how many fixtures can attach to each vent stack as well as each drain.

Step 3: Cleanout, Trap, and Vent Installation

Most plumbing code requires that each plumbing fixture has a trap and a vent pipe. These codes may also require clean-outs to be installed to the exterior to the slab. If you properly install your clean-outs in the beginning, then it will make it much easier to keep the system in good order.

Step 4: Check Your Pipe Requirements

Drains, stub-outs, and vent stacks are all different sizes. These are based on fixtures that will be attached to them. This can also be based upon where they need to be placed in accordance to the plumbing code.

Your final drainage pipe size will be determined by the number of bathrooms and fixtures in a home. Your new toilet will need to have a stub-out in the drain-waste-vent system.

Step 5: Always Check Your System

Always check for air or water leaks. If it leaks, the system must be repaired.

Related Questions

How do I seal the rim of the toilet bowl?

You can seal the rim of the toilet bowl at the floor with a bead of tub and tile caulking.