How To Paint Behind The Toilet (Without Even Removing the Tank)
The toilet is the worst place to paint behind in the bathroom. It’s such a tight space, not allowing you enough maneuverability to paint comfortably.
Let’s face it: painting inside a bathroom is not an easy task. The bathroom is often a crowded space as it is. The truth is, at some point in the project you’ll have to lean over the toilet and use your best efforts to reach around a brush, especially with corner toilets.
All just to paint behind the toilet, without removing the tank I might add. If you’ve already attempted to do this DIY task as a homeowner, you probably know what I mean.
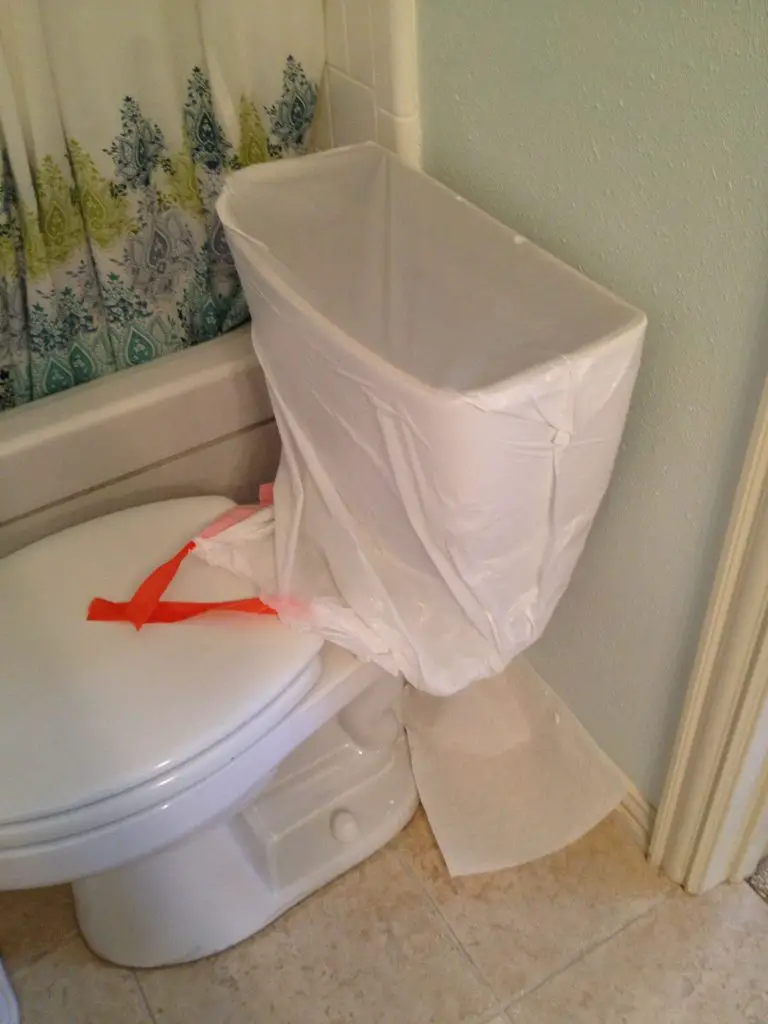 Cover the toilet with a trash bag and the floor with cloths so you don’t make a big mess.
This is important to do when you have to paint the entire wall behind your toilet or if you plan on painting your entire bathroom.
Before you begin the project, make sure you have the right paint and primer.
As bathrooms get exposed to lots of humidity, your choice of paint should be one of the highest quality.
Consider buying paint with anti-microbial additives like Benjamin Moore or other leading brands. Paints with semi-gloss or high-gloss finishes are also a good option; their sheen helps avoid moisture way better than matte paints.
Also, consider getting a high-quality primer that won’t peel or bring on water damage.
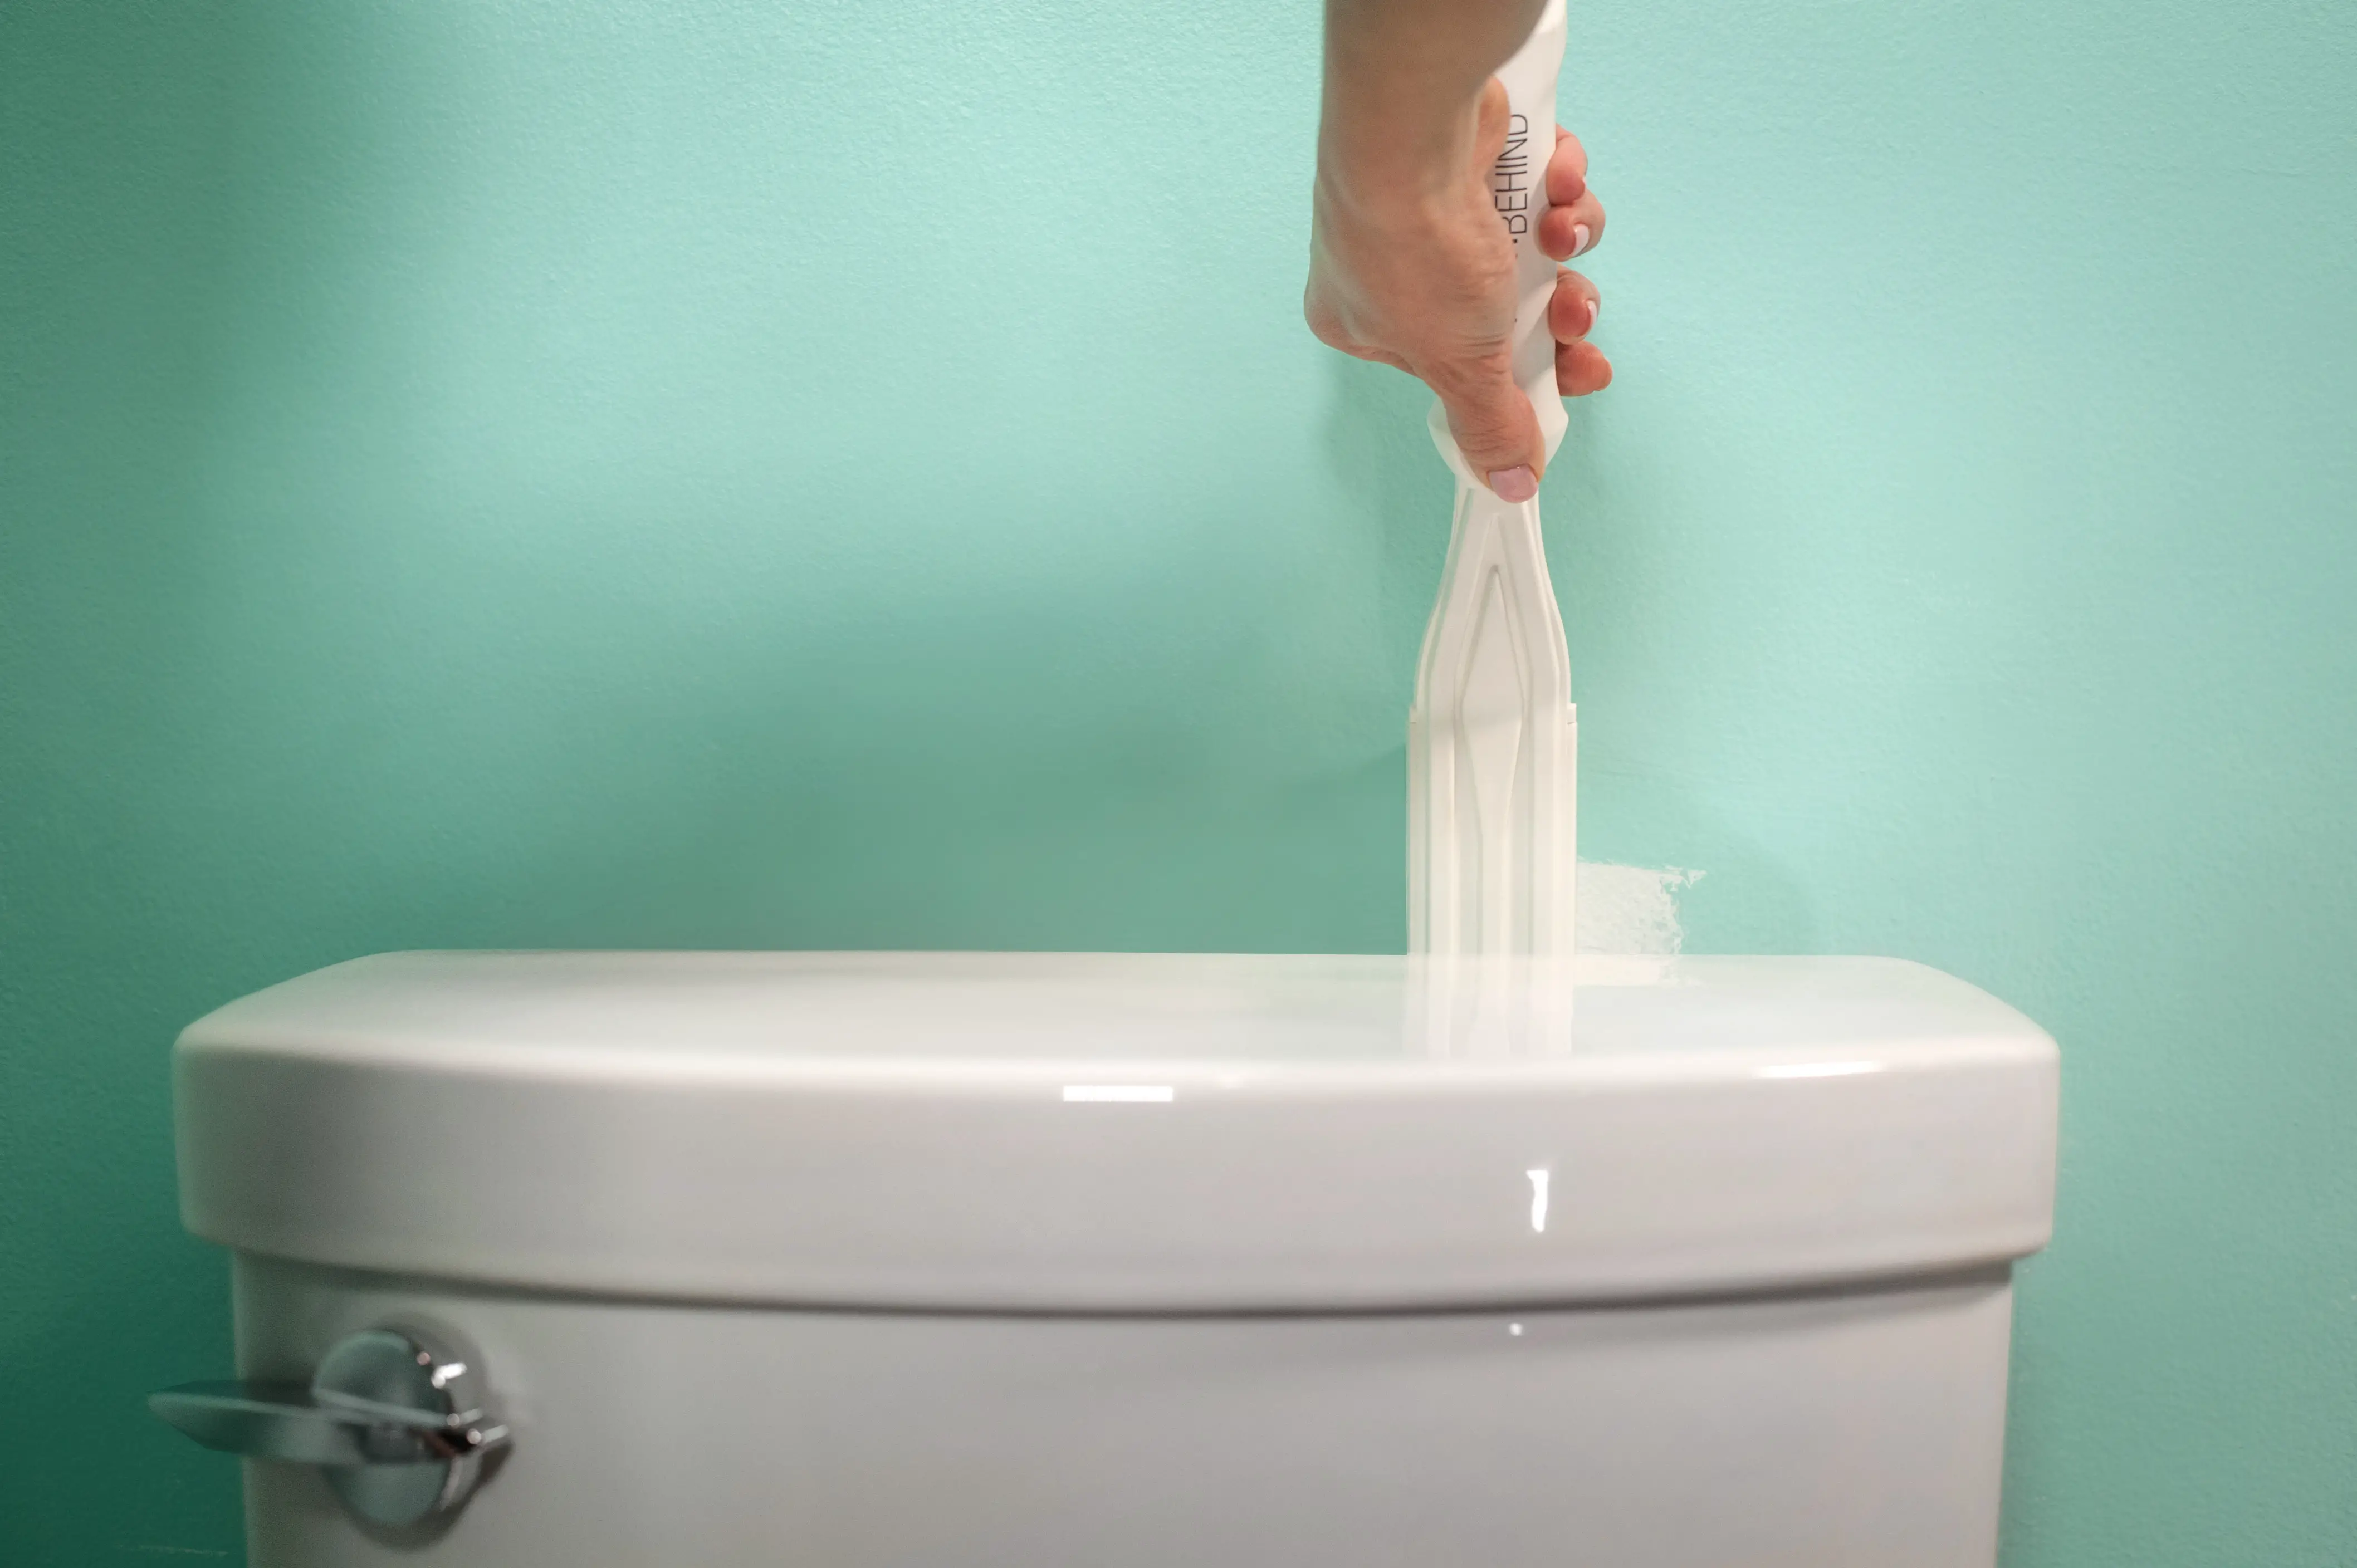
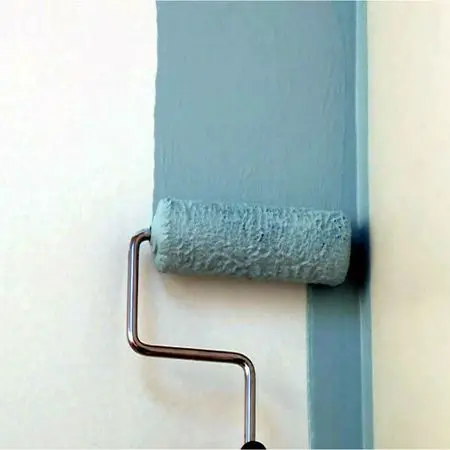 The mini roller is the best tool to use to paint behind the toilet. It’s a relatively easy way to get the job done, and even beginners can do it successfully.
Mini rollers normally have a 16″ neck and a roller pad that’s about 1″ wide.
By using a 4″ roller pad, you should be able to easily paint behind your toilet, without ever removing the water tank.
Even though this roller is really small, you don’t have to go out and buy a special tray for it. You can use the same tray you would use with your larger 9″ roller.
Personally, I prefer the KingOrigin tray, along with the Linzer RM4110 plastic tray liner because it is disposable and eco-friendly.
According to a painter we spoke with who has 20 years of experience, this method never failed him. Mini rollers work most of the time, allowing you to get behind the toilet and get to painting.
When you finish painting behind your toilet, pull the blue tape from each side of the water tank and from the trim.
Look around to ensure you didn’t get any paint on the toilet itself. If there’s some paint on it, clean it up right away. Luckily for you, paint doesn’t stick to the toilet right away as it’s made of porcelain.
 While the mini roller method to paint behind a toilet usually works, it’s not ideal in every single situation. Having another option can be quite helpful.
If your toilet tank has a clearance of an inch or less from the wall, you’ll need to improvise in order to get behind that tight space. Worry not — we have a solution.
What homeowners or painters should do in this predicament is to cover the toilet’s tank with a heavy-duty plastic bag. The bag should cover the tank completely and the space behind the wall. Put some tape on the bag so it’s secured tightly.
Next, pick up a really thin piece of wood or a painting stick, like the one from Jimmy Sponge Stix. Take a rag and wrap it around the stick or piece of wood. One side of your rag should be covered in paint; dip it into your tray or use a brush to get paint on it.
Slide the stick back and forth between the wall and your water tank. Continue doing so until the wall is completely painted to your satisfaction.
This process takes quite some time though, and won’t leave your paint job with the perfect look. In a tight space, it may be the best you can do.
In the event this method doesn’t work, you’ll have to resort to our third and final technique.
 Earlier we mentioned we want to avoid this technique. However, it may not be possible in some situations.
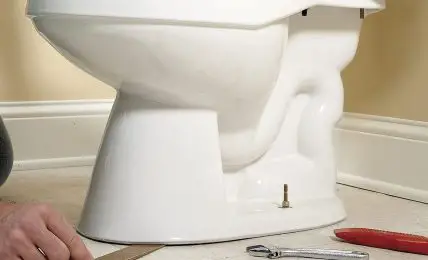
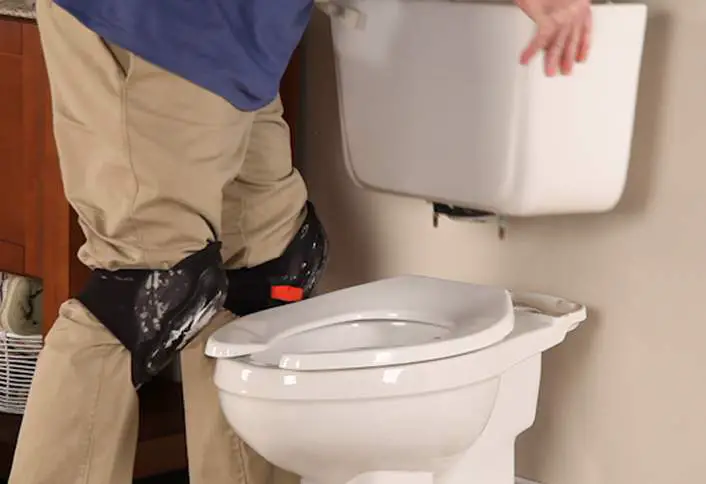
To have complete access to the wall, remove the water tank (not the entire toilet).
Only follow this option if you don’t have to remove the toilet completely. In some instances, the water tank doesn’t separate from the bowl. If this is true in your case, this method won’t apply.
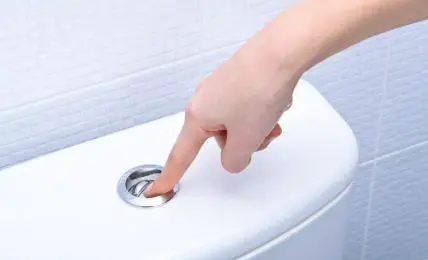
Before you remove the water tank, make sure to turn off the water that flows into the tank. To do so, locate the valve on the wall, right behind the toilet. Flush the toilet once to empty out the water tank.
At last, you’ll want to also unscrew the attached water hose from the water tank. Normally, this is located on the left bottom corner of the tank.
Almost all water tanks are attached to the toilet’s bowl with two plastic bolts and nuts. Although, if you have a wall-mounted toilet, it may be attached a bit differently. Those are located right under the water tank (on both sides) which is the only thing holding the tank in place.
Go ahead and unscrew the nuts from the bolts. Next, lift the tank up slowly and place it away from your workspace, so it doesn’t get wet while you’re working.
Proceed to paint the wall space behind your toilet. The process should be quite easy now. You should have enough clearance from the wall, even if the bowl is still in place.
Finished painting? Great! After the wall dries from the paint, simply put the water tank back on the bowl by putting the bolts through the right holes.
Tighten the tank to the bowl by screwing the nuts back into the bolts. Reattach the hose to the water line and turn the water back on. Give the toilet one flush to see that the toilet is working as it should.
Don’t worry yourself with getting the perfect paint job behind your toilet. Most people won’t look behind your toilet or be able to see the space back there.
By using one of the tips above, we are sure you’ll come out with stellar results you’ll be proud of.
As always, good luck with your DIY painting project!