Do You Need a Raised Toilet Seat After Knee Replacement?
If you have recently had knee surgery, you may be wondering what adaptations you need to make around the house. One area of concern you may have is the bathroom. Specifically, do you need a raised toilet seat for your bathroom?
A raised toilet seat may not be necessary, but it can relieve a lot of pressure from your knee. For this reason, it is recommended, and some doctors may prescribe its use.
You need a raised toilet seat after surgery if your current toilet is not high enough to reach the crease at the back of your knee when standing. The toilet needs to be this tall to avoid putting too much pressure on your knee.
Having a raised toilet seat provides several benefits for someone with recent knee surgery, and some of the benefits are listed below.
There are three primary types of raised toilet seats.
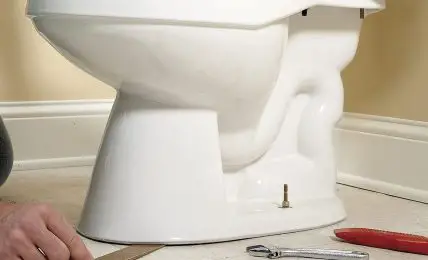
Toilet Base Riser: This option takes more work to install; however, some prefer the look. Notably, this method actually raises the base of the toilet rather than the actual toilet seat.
This option would be better for someone concerned about a slow recovery since it is a permanent adaptation.
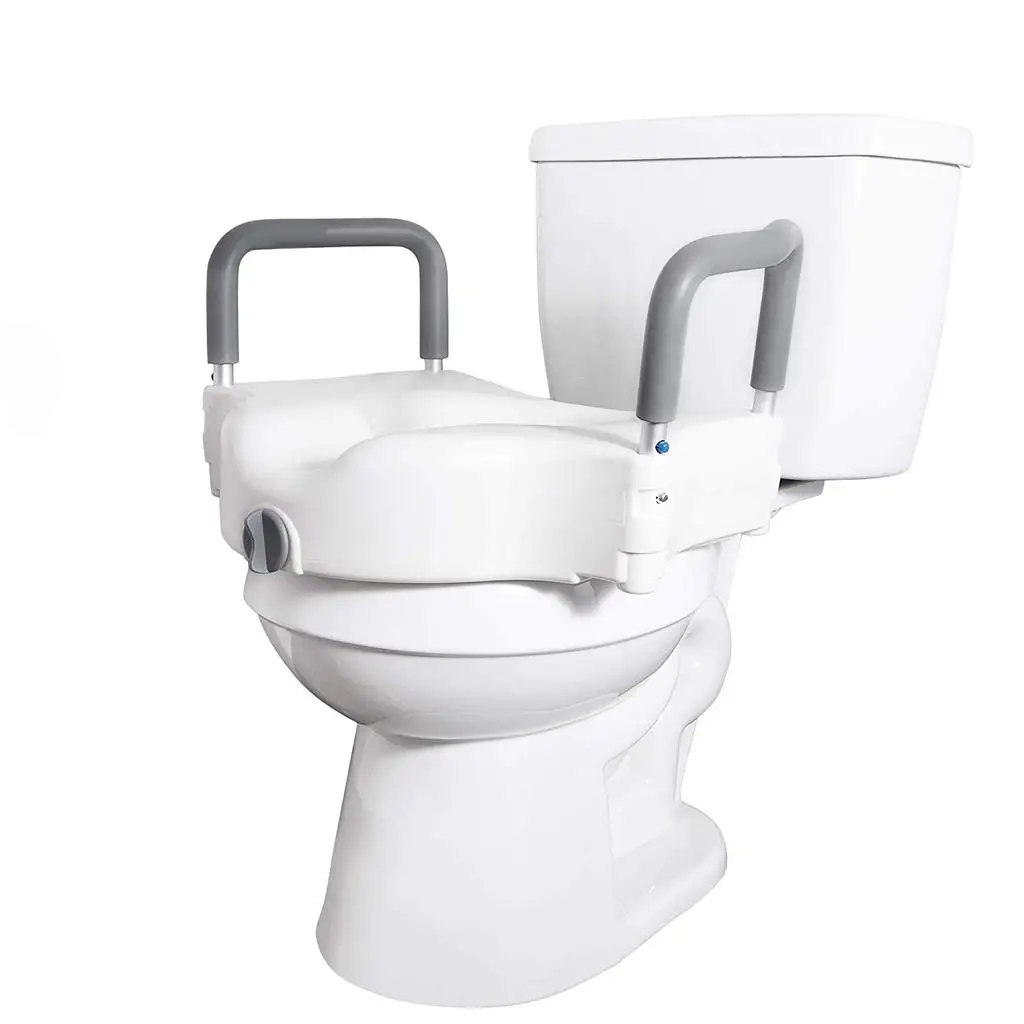
Elevated Toilet Seat: An elevated toilet seat replaces your current toilet seat, making it a sturdy option for adapting your toilet.
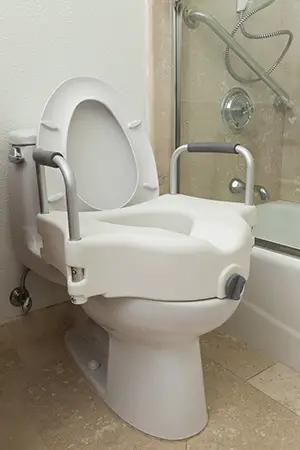
Toilet Seat Riser: This option works well for people wanting a more temporary adaptation. It uses an attachment to lift your current toilet seat. Thus, you can simply remove the attachment when you no longer need a raised toilet seat.
It essential to get the features you need in a raised toilet seat to help you during your recovery and speed your recovery along. Several common features are listed below.
Installation: Although installing most raised toilet seats is easy, if you have to install it yourself, you’ll need it to be very easy. Therefore, you may want one of the models that simply press on the current seat to install.
Toilet Height: Toilet height is a crucial feature for someone recovering from knee surgery as the seat needs to reach the crease at the back of your knee. This height keeps you from bending too far, thus straining your knee.
Padded Seat: A padded seat is excellent for comfort; however, unfortunately, you’ll probably have to give up some height for comfort. Generally, padded seats only come in 1 to 2-inch heights.
Handles: Handles can help someone when they are getting on or off the toilet, which is an excellent addition for someone recovering from knee surgery. However, someone needs to make sure the person that will be using the toilet has sufficient space.
Portability: It is possible to buy a lightweight, portable toilet if you need it.
Weight Capacity: Raised toilet seats can have different weight capacities, so be careful to choose one with the necessary capacity.
A toilet base riser not only raises the entire toilet but extends the soil pipe as well. To install one, follow these steps.
These toilet seats typically do not even require removing your existing toilet seat. To install, you must:
A toilet seat riser connects similarly to a raised toilet seat. However, this allows you to connect your lid and sometimes seat to your riser. Follow these steps to install.
You need to use the raised toilet seat for however long your surgeon recommends to avoid straining your knee. However, it is possible you may want to use the seat even longer if using it makes you more comfortable.
Also, you might want to keep the seat around after you remove it. Notably, this could be a good idea since insurance companies may limit how often they are willing to cover the cost.