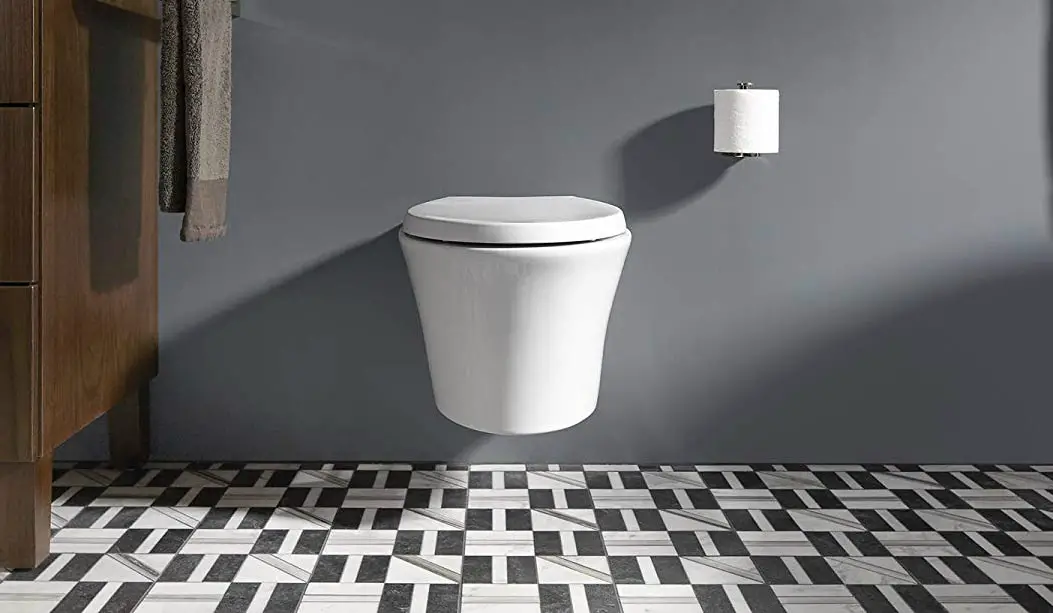
Wall hung toilets have been popular in Europe for years and are starting to become a hit in the United States. It’s easy to see why when they save several inches of space in an often cramped bathroom.

However, installation is a little more challenging than the average toilet, so you are probably wondering how you can do it.

In order to install it will be necessary to mount the support frame between two studs. If necessary, Attach the drain and supply pipes and then mount the toilet bowl to the frame.

Planning

To install a wall-mounted toilet, you will need to open part of the wall to install the framework. You will need to ensure that the thickness of your studs can support the weight of the toilet you have chosen. Additionally, you must ensure your stud width will give enough, but not too much space for the toilet frame to fit in.

You must now ensure your plumbing is ready to work with a wall-mounted toilet. To do this, trace your lines and find where they end. You will typically need a 1/2″ line for your cold water supply.

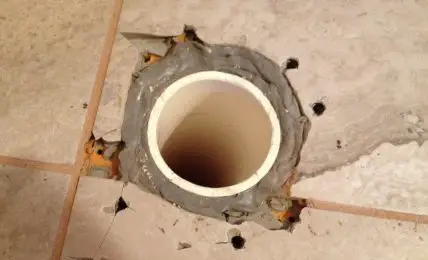
Your drain line must end in the wall and typically must be 3″ inches in diameter. If you are replacing a floor-mounted toilet, you will likely have to relocate your drain line. This will probably require removing part of your flooring or, if possible, the roof of a lower story.

If your bathroom is already set up to receive a wall-mounted toilet, simply ensure the studs and fittings match the model you choose.

Installing the Framework

To install a wall-mounted toilet, you must install the toilet’s framework. This will be mounted to the studs inside the wall and serve to mount the toilet, plumbing, and mechanical assemblies. To install the framework, follow these steps.

  1. Set the height. Slide the feet into the framework and adjust the height so that the toilet will rest at a comfortable level and allow the plumbing to fit.
  2. Place the framework. You will not connect it quite yet, but place it into its final position and locate the holes for your support screws. Mark the locations on the studs and remove the framework.
  3. Drill out your marks. Use a power drill, and use drill bits slightly smaller than your mounting screws.
  4. Mount the Frame. Place the framework in place and install the mounting screws to permanently affix the framework.

Attach the Plumbing and Toilet to the Frame

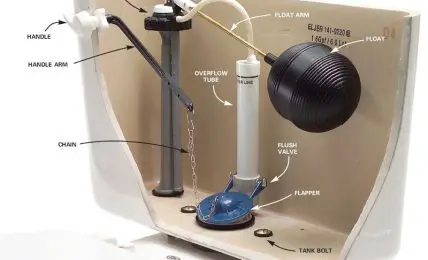
Now that the frame is mounted, everything else needs to be attached. First, connect the plumbing and, finally, the toilet to the frame. To do this, follow these steps.

  1. Attach the drain line. First, ensure the drain line that came with your toilet will fit. If not, you may have to adjust the height of the frame. Then, place the rubber gasket and the drainpipe before attaching the clip around the pipe to the frame.
  2. Attach the tank if necessary. Much of the time, tanks will be preinstalled onto the framework. If it is not, install it now and ensure any rubber washers that came with the kit are installed before inserting the mounting bolts. Clip the fill pipe into place and install the rubber washer.
  3. Insert the bowl’s threaded rods. Insert them into the framework, but make sure that they protrude to the manufacturer’s guidelines. However, in the absence of manufacturer guidelines, a bit more than two inches is sufficient.
  4. Ensure gasketing is in place. Make sure that the rubber gaskets are in place on both the drain pipe and the fill pipe. Also, you may want to put silicone caulk on the flat parts of the rear of the bowl.
  5. Attach the bowl. Slide it onto the bolts and make sure to connect it to the two pipes. Now slide the included washers, including any felt or rubber ones. Then insert and tighten the nuts to hold the bowl in place.
  6. Test the toilet. Turn the water on, including any shutoff valves on the piping. Let the tank fill and flush. If it works, then you are ready to remove the bowl and reinstall the walling.
  7. Remove the bowl. Simply undo the bolts while supporting the toilet and slide the bolts and washers off, storing them where you won’t lose them. Now gently slide the toilet bowl off the supports and set it aside carefully.
  8. Cut out the replacement panels. How you fill in your wall depends on what you had before, but waterproof plywood at least 18mm thick is often a good place to start. Your toilet probably came with an included template to allow you to cut out wall panels. You can use this for both plywood and any decorative wall covers.
  9. Reinstall the toilet bowl. Once you are done with any wall repairs, and it has thoroughly dried out if necessary, the bowl can be installed. Simply slide the bowl over the threaded rods and fix it in place with the washer and nuts. Do not overtighten.
  10. Apply any exterior panels that came with the toilet kit. You can also apply silicone caulk around the rims of the bowl where it meets the wall if you wish.

Related Questions

Advantages of a Wall Mounted Toilet

Wall mounted toilets have many advantages and here are a few of them.

  1. Saves Space: The toilet tank is hidden in the wall, and the toilet does not rest on the floor. Thus, the bathroom has more available floor space.
  2. Easy to clean: Because the toilet bowl and the area around it are easy to access, a Wall Mounted toilet is easy to clean.
  3. Convenient Height: You can place a Wall Mounted toilet at whatever height you want. This is a significant advantage for people that have trouble accessing a standard floor toilet.

Disadvantages of a Wall Mounted Toilet

Wall-mounted toilets are space-saving wonders, but they are not perfect. Here are a few flaws.

  1. Not many options: Only a limited number of companies offer wall-mounted toilets, and those offer few models. Non wall mounted toilets offer space saving models.
  2. Price: The cost of installing a wall-mounted toilet is higher than that of a traditional toilet. Wall-mounted toilets may require additional plumbing as well as changes to the wall.
  3. Difficult to repair: The tank of a wall-mounted toilet is in the wall, making it difficult to access. This makes repairs harder and more costly.

How Much Weight Can a Wall-Mounted Toilet Support?

The typical wall-mounted toilet can hold a minimum of 500 pounds. This is required in the United States. However, the toilet must be installed correctly to support this amount of weight.

How Do You Fix a Leaky Wall Mounted Toilet?

There are several reasons a wall-mounted toilet may leak. Some reasons include loose mounting nuts, cracked bowl, and leaking supply lines. Here are some ways to deal with this.

  1. Check the bowl mounting nuts. These should be snug. If you can jostle the bowl or these feel at all loose, tighten them.
  2. Check the supply hoses. Shut off the water and disconnect the flexible hoses. Check for cracks or damaged fittings. If you find any, replace the hoses.
  3. Check the bowl for cracks. An excellent way to do this is to pour food coloring into the bowl and look over the outside for any signs of it. If you find any, that means there is a crack, and the bowl will need to be replaced. Contact the manufacturer for a replacement bowl.